Croquet Microverse Development Guide
Introduction
Croquet Microverse allows you to create a multiuser virtual 3D world. You can add new 3D objects, change their properties, and write their "behaviors" dynamically, all while you and other users are in the same world.
Every object you create in the world is called a "card". A card can be in any shape and size. Some cards are flat, some hold 3D models, some cards' visual representation are generated programmatically by a behavior. Even the terrain model on which the avatars walk is a card with a 3D model. You can typically drag and drop a 3D model file or an image into a running world to create a card. You can also write a simple specification file to start a new world.
Cards communicate with each other using the Croquet's publish/subscribe mechanism to trigger actions.
A behavior is an object-extension mechanism. It is like a subclass of a card which can be attached and detached to a card dynamically. Attached behaviors can enhance features of the "actor" (the model) of the card as well as the "pawn" (the view).
Therefore, creating a Croquet Microverse world means to arrange your 3D objects in the world, including the terrain model, and specify behaviors to some objects. Other user can join a world where you can collaboratively create it. Once you are satisfied, the world definition can be saved into a file, or card specifications can be extracted to the world file.
Start a demo world
You can specify the starting point of a session by giving a URL parameter ?world=. If the value for this parameter does not end with .vrse, the value is interpreted as the name of a file in the worlds directory, and corresponding .js file is used as template. If the value ends with .vrse, it is interpreted as a URL for a .vrse file saved from the Save menu. The VRSE file can be a URL for a public place like GitHub Gist.
One of the demo worlds in the repository is called tutorial1, and can be entered by opening http://localhost:9684/?world=tutorial1
Use create-croquet-microverse package
Instead of cloning the main github repository, you can also create a minimum set of files to run Croquet Microverse which you can use as a starting point of your own project. Create an empty directory and run
npm create croquet-microverse@latest
World Template File
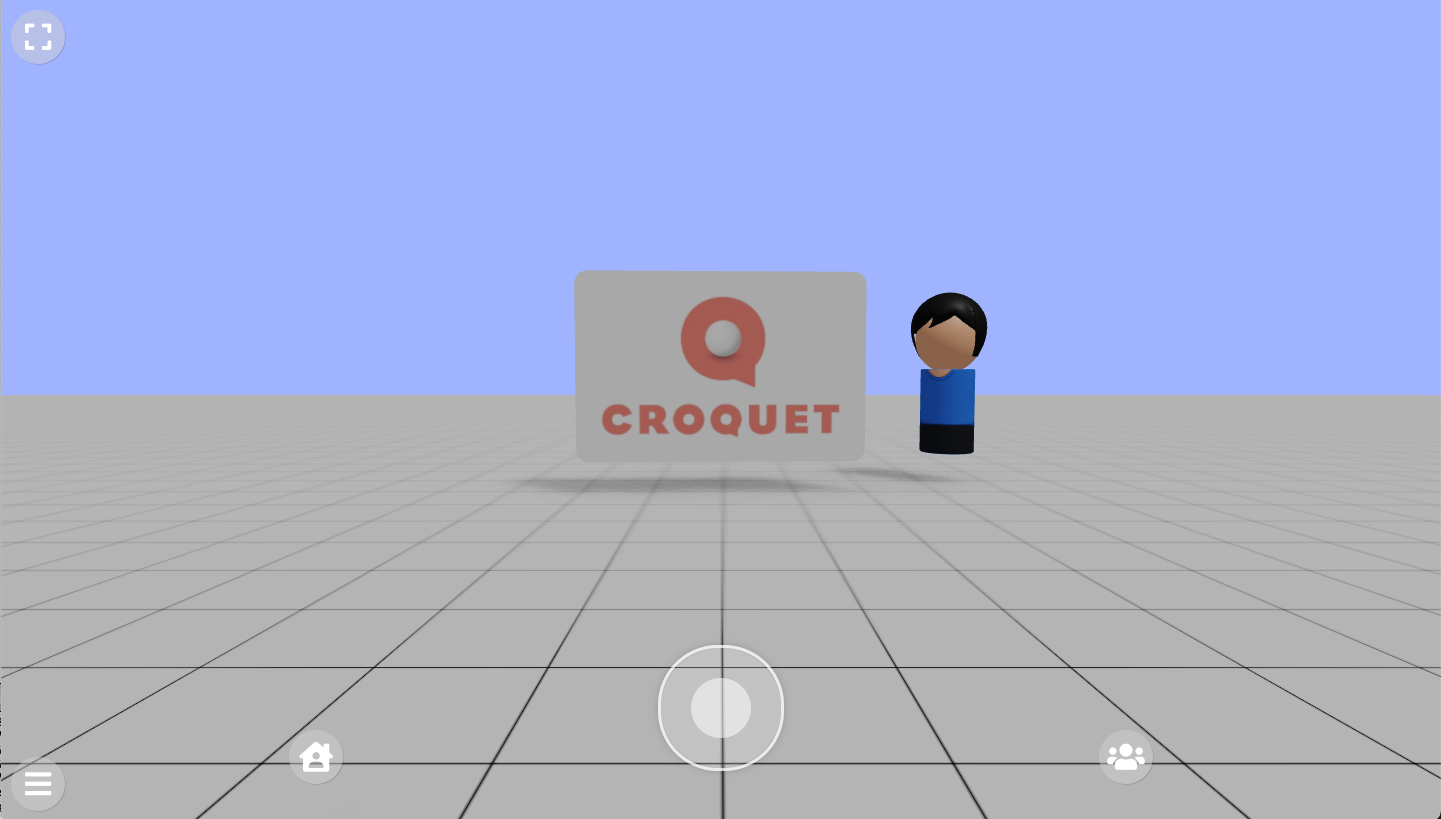
Tutorial1 is made up of three cards (not including the avatars). There is a floor card, which allows us to walk around. A light card that lets us see the world around us. And a flat card with the Croquet logo on it. The code defining this world can be found in the worlds directory. Open microverse/worlds/tutorial1.js in your text editor to see the following code. The init function is used to define the objects that make up the world.
The first value is Constants.AvatarNames, which specifies the name of the 3D model files in microverse/assets/avatars folder. When you add your own avatars, you can simply place them in the same folder and specify their names here.
export function init(Constants) {
    Constants.AvatarNames = [
        "newwhite", "fixmadhatter", "marchhare", "queenofhearts", "cheshirecat", "alice"
    ];
The next section defines the various behaviors we will be attaching to our cards. Typically you create a directory for your behavior modules for the world you are creating, and list them in this section.
    Constants.UserBehaviorDirectory = "behaviors/tutorials";
    Constants.UserBehaviorModules = [
        "lights.js", "gridFloor.js", "joeTheBox.js"
    ];
The final section is where we define the cards. A card is defined by a number of parameters including the name, type, its initial location, scale, orientation, etc. (The full specification of parameters is described in CardSpec.md in the docs directory.)
You can also specify a list of behaviors for a card. A behavior can define the visual representation, how it acts when a user interacts with it, or how it can access live external data streams. In the example below, the first card, named the "world model" is defined by the "GridFloor" module. We will take a look at that shortly. The second card, named "light", defines the lighting in this world. The third card, named "image card", is an example of a typical card in the Croquet Microverse. It creates a floating object in the middle of the scene with the Croquet logo applied.
    Constants.DefaultCards = [
        {
            card: {
                name: "world model",
                behaviorModules: ["GridFloor"],
                layers: ["walk"],
                type: "object",
                translation:[0, -2, 0],
                shadow: true,
            }
        },
        {
            card: {
                name: "light",
                layers: ["light"],
                type: "lighting",
                behaviorModules: ["Light"],
                clearColor: 0xaabbff,
            }
        },
        {
            card: {
                name: "image card",
                translation: [0, 0.4, -10],
                scale: [4, 4, 4],
                type: "2d",
                textureType: "image",
                textureLocation: "./assets/images/CroquetLogo_RGB.jpg",
                frameColor: 0xcccccc,
                color: 0xffffff,
                cornerRadius: 0.05,
                depth: 0.05,
                shadow: true,
            }
        },
    ];
Behaviors
Behaviors are a class extension mechanism in the Croquet Microverse. It is like subclassing to enhance a card, but you can attach and detach a behavior to/from the actor and the pawn dynamically.
Since a behavior typically requires an actor side and pawn side to work together, we package list of behaviors for the actor and pawn which are separate into an entity we call the "behavior module",
From our tutorial1, let us look at the behaviors in the GridFloor module.
// Grid Floor
// Croquet Microverse
// Generates a simple gridded floor card

class GridFloorPawn {
    setup() {
        let THREE = Microverse.THREE;
	let gridImage = "data:image/png;base64,iVBORw0KGgoAAAANSUhEUgAAAEAAAABACAYAAACqaXHeAAAABHNCSVQICAgIfAhkiAAAAAlwSFlzAAAOnAAADusBZ+q87AAAAJtJREFUeJzt0EENwDAAxLDbNP6UOxh+NEYQ5dl2drFv286598GrA7QG6ACtATpAa4AO0BqgA7QG6ACtATpAa4AO0BqgA7QG6ACtATpAa4AO0BqgA7QG6ACtATpAa4AO0BqgA7QG6ACtATpAa4AO0BqgA7QG6ACtATpAa4AO0BqgA7QG6ACtATpAa4AO0BqgA7QG6ACtATpAu37AD8eaBH5JQdVbAAAAAElFTkSuQmCC";

        let image = new Image();
        let texture = new THREE.Texture(image);
        image.onload = () => texture.needsUpdate = true;
        image.src = gridImage;

        texture.wrapS = THREE.RepeatWrapping;
        texture.wrapT = THREE.RepeatWrapping;
        texture.repeat.set( 100, 100 );

        if (this.floor) {
            this.shape.remove(this.floor);
            this.floor.dispose();
        }

        this.floor = new THREE.Mesh(
            new THREE.BoxGeometry( 100, 0.1, 100, 1, 1, 1 ),
            new THREE.MeshStandardMaterial({ map: texture, color: 0xcccccc }));
        this.floor.receiveShadow = true;
        this.shape.add(this.floor);
        this.cleanupColliderObject()
        if (this.actor.layers && this.actor.layers.includes("walk")) {
            this.constructCollider(this.floor);
        }
    }
}

export default {
    modules: [
        {
            name: "GridFloor",
            pawnBehaviors: [GridFloorPawn],
        }
    ]
}
Since this module only defines the visual representation, it does not have any actor behaviors. The pawn behavior add a new Three.js Mesh to this.shape, which is the Three.js Group that represents the root of the visual apperanace.
Behaviors Life Cycle
Because behaviors are dynamically attached and detached, one needs to understand their "life cycle". When the definition of a behavior is edited and updated (via the watch server or in-world editing), the setup() method of the edited behavior is called. When a behavior is detached from the card, the teardown() method is called. Also note that when the browser tab running the application is hidden, the application may lose the WebSocket connection to the Croquet backend. The Croquet system is designed to automatically reconnects and reconstruct the view smart when the tab comes back to the foreground. However, it means that the setup() method may be called again at that moment.
So it is a typical idiom that the setup() method cleans up resources it has created in the previous invocation.
In the GridFloorPawn case, we remove the this.floor object that may exist when setup() is invoked, and then create the new floor Mesh.
The Microverse variable contains all of the exported functions and objects from the Microverse system, including many features re-exported from the Worldcore framework. Refer to the Worldcore documentation for what is available. The most commonly used one is Microverse.THREE, which contains all exports from Three.js.
Let us look at another module for slightly more involved example of the life cycle.
class SpinActor {
    setup() {
        this.listen("startSpinning", "startSpinning");
        this.listen("stopSpinning", "stopSpinning");
    }

    startSpinning(spin) {
        this.isSpinning = true;
        this.qSpin = Microverse.q_euler(0, spin, 0);
        this.doSpin();
    }

    doSpin() {
        if(this.isSpinning) {
            this.setRotation(Microverse.q_multiply(this._rotation, this.qSpin));
            this.future(50).doSpin();
        }
    }

    stopSpinning() {
        this.isSpinning = false;
    }

    teardown() {
        delete this.isSpinning;
        this.unsubscribe(this.id, "startSpinning");
        this.unsubscribe(this.id, "stopSpinning");
    }
}

class SpinPawn {
    setup() {
        this.addEventListener("pointerDown", "onPointerDown");
        this.addEventListener("pointerUp", "onPointerUp");
        this.addEventListener("pointerMove", "onPointerMove");
    }

    theta(xyz) {
        let origin = this.translation;
        return (Math.atan2(origin[2] - xyz[2], xyz[0] - origin[0]) + Math.PI * 2) % (Math.PI * 2);
    }

    onPointerDown(p3d) {
        this.base = this.theta(p3d.xyz);
        this.baseRotation = [...this._rotation];
        this.say("stopSpinning");
        this.moveBuffer = [];
    }

    onPointerMove(p3d) {
        this.moveBuffer.push(p3d.xyz);
        if (this.moveBuffer.length > 3) {
            this.moveBuffer.shift();
        }
        let next = this.theta(p3d.xyz);
        let newAngle = ((next - this.base) + Math.PI * 2) % (Math.PI * 2);
        let qAngle = Microverse.q_euler(0, newAngle, 0);

        this.say("setRotation", Microverse.q_multiply(this.baseRotation, qAngle));
    }

    onPointerUp(p3d) {
        if (p3d.xyz){ // clean up and see if we can spin
            if (this.moveBuffer.length < 3) {return;}
            let prev = this.theta(this.moveBuffer[0]);
            let next = this.theta(p3d.xyz);
            this.onPointerMove(p3d);
            this.deltaAngle = (next + (Math.PI * 2)) % (Math.PI * 2) - (prev + (Math.PI * 2)) % (Math.PI * 2)
            if(Math.abs(this.deltaAngle) > 0.001) {
                let a = this.deltaAngle;
                a = Math.min(Math.max(-0.1, a), 0.1);
                this.say("startSpinning", a);
            }
        }
    }

    teardown() {
        this.removeEventListener("pointerDown", "onPointerDown");
        this.removeEventListener("pointerUp", "onPointerUp");
        this.removeEventListener("pointerMove", "onPointerMove");
    }
}

export default {
    modules: [
        {
            name: "Spin",
            actorBehaviors: [SpinActor],
            pawnBehaviors: [SpinPawn]
        }
    ]
}

/* globals Microverse */
The overall structure of this is that the pointer event handlers (for pointerDown, pointerUp and pointerMove) are added to the pawn, and each of which invokes methods called onPointerDown, onPointerMove, and onPointerUp, respectively. The computed qAngle in onPointerMove is used to send the setRotation event. Upon pointerUp, it determines if the card should keep spinning (if it had three or more move events before pointer up), and send an event called startSpinning.
On the actor side, the startSpinning and stopSpinning, which is sent when the next pointerDown occurs, are handled.
The last export statement exports those two behaviors as a module named "Spin".
Recall that setup() may be called multiple times in the life cycle of a card. To mitigate developer's burden, addEventListener() and subscribe() for a card internally keep track of the current listeners and subscriptions, and automatically remove or unsubscribes previous registration before adding new ones. This is why the subscribe()/listen() and addEventListener() calls in the setup() methods for both actor and pawn are simply called without any guards.
However, other kinds of initialization often requires some care. For example, creating a property on the actor side should typically look like this to initialize properties only for the first time.
    setup() {
        if (this.speed === undefined) this.speed = 0.1;
        if (this.angle === undefined) this.angle = 0.02;
	...
    }
Also if a behavior for a pawn creates Three.js objects, the setup() typically removes them before creating new ones, as shown in the GridFloor example.
But don't worry too much about these details initially. Even if you forget to add them at the beginning, the system will keep working, and you can incrementally (and quickly!) correct your code.
The list of behavior files are specified in the world template file is used to load behaviors when the world template file is used to create a new session. Once you connect to to the watch server by pressing the "Connect" item in the world menu, the watch server will look for changes to an existing files as well as newly-added files in the UserBehaviorModuleDirectory.
Debugging
There are a few tips to know when you debug behavior code with browser's developer tools. The first thing to keep in mind is that the behavior is stringified and then evaluated to create a JavaScript class object. Therefore, the code is not fully bound to the original source code anymore, therefore you cannot set a break point if you navigate to the file from the browser's navigation pane.
However there are a few ways to work with the browser's developer tool. We utilize the sourceURL mechanism of modern browsers' developer tools, the behavior name is shown in the "Sources" tab.
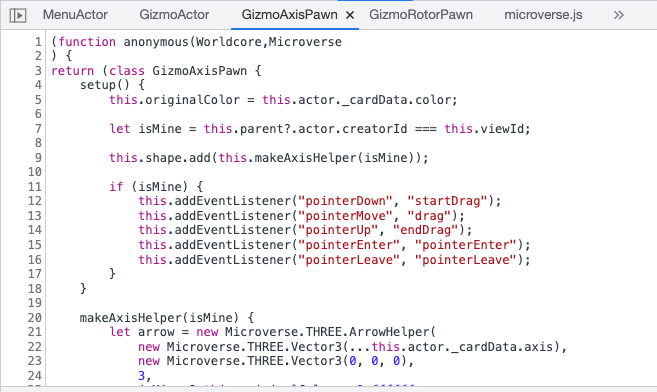
You can put a debugger statement in your behavior code. If the session is connected to the watch server the new definition of behavior is loaded immediately and the breakpoint will be triggered when execution hits the statement.
Another is to put a console.log call in behavior code. When the console.log is executed and you see results in the console, click on the behavior name you are interested (LightPawn, ElectedPawn etc. in the image below);

You can set a breakpoint by clicking the line number in the code that is displayed.
Note that when the execution of the program is stopped at the breakpoint for more than 30 seconds, the WebSocket to the reflector is disconnected. This is okay as Croquet will reconnect when you continue execution; but an event may be lost if the view is destroyed.
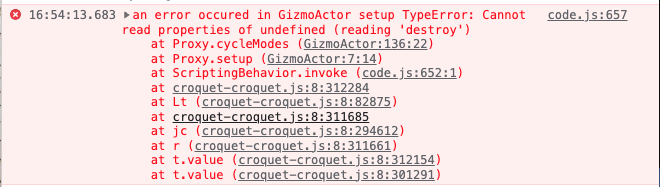
Inevitably you will encounter errors during the development. Because your code will be invoked from Croquet's publish/subscribe messaging system and also the invocation typically is wrapped in a Proxy, the stack trace is slightly more convoluted. However, you can still see the top of the stack and the error (typically shown like the image below), and see that the error occurred in GizmoActor's cycleModesmethod, and the error wasdestroyis not a property ofundefined`.
Once you figure this out, you can put a breakpoint in the offending method and step execute.
A Croquet Microverse session may lock up when Three.js crashes with NaN or Infinity or some other values that are created by the program, you create an infinite loop in JavaScript, or any other reasons that is hard to guard against. But don't worry. Your work is typically saved on the disk, and you can just re-launch a fresh session. It is useful to time to update your start .js file so that next session has all things you want.
The Property Sheet
You can bring up the Property Sheet for a card by holding down the control key or the alt key on some platforms, clicking on a card, and then click on an icon that looks like a pane-based tool (labeled as "B" in the image below).
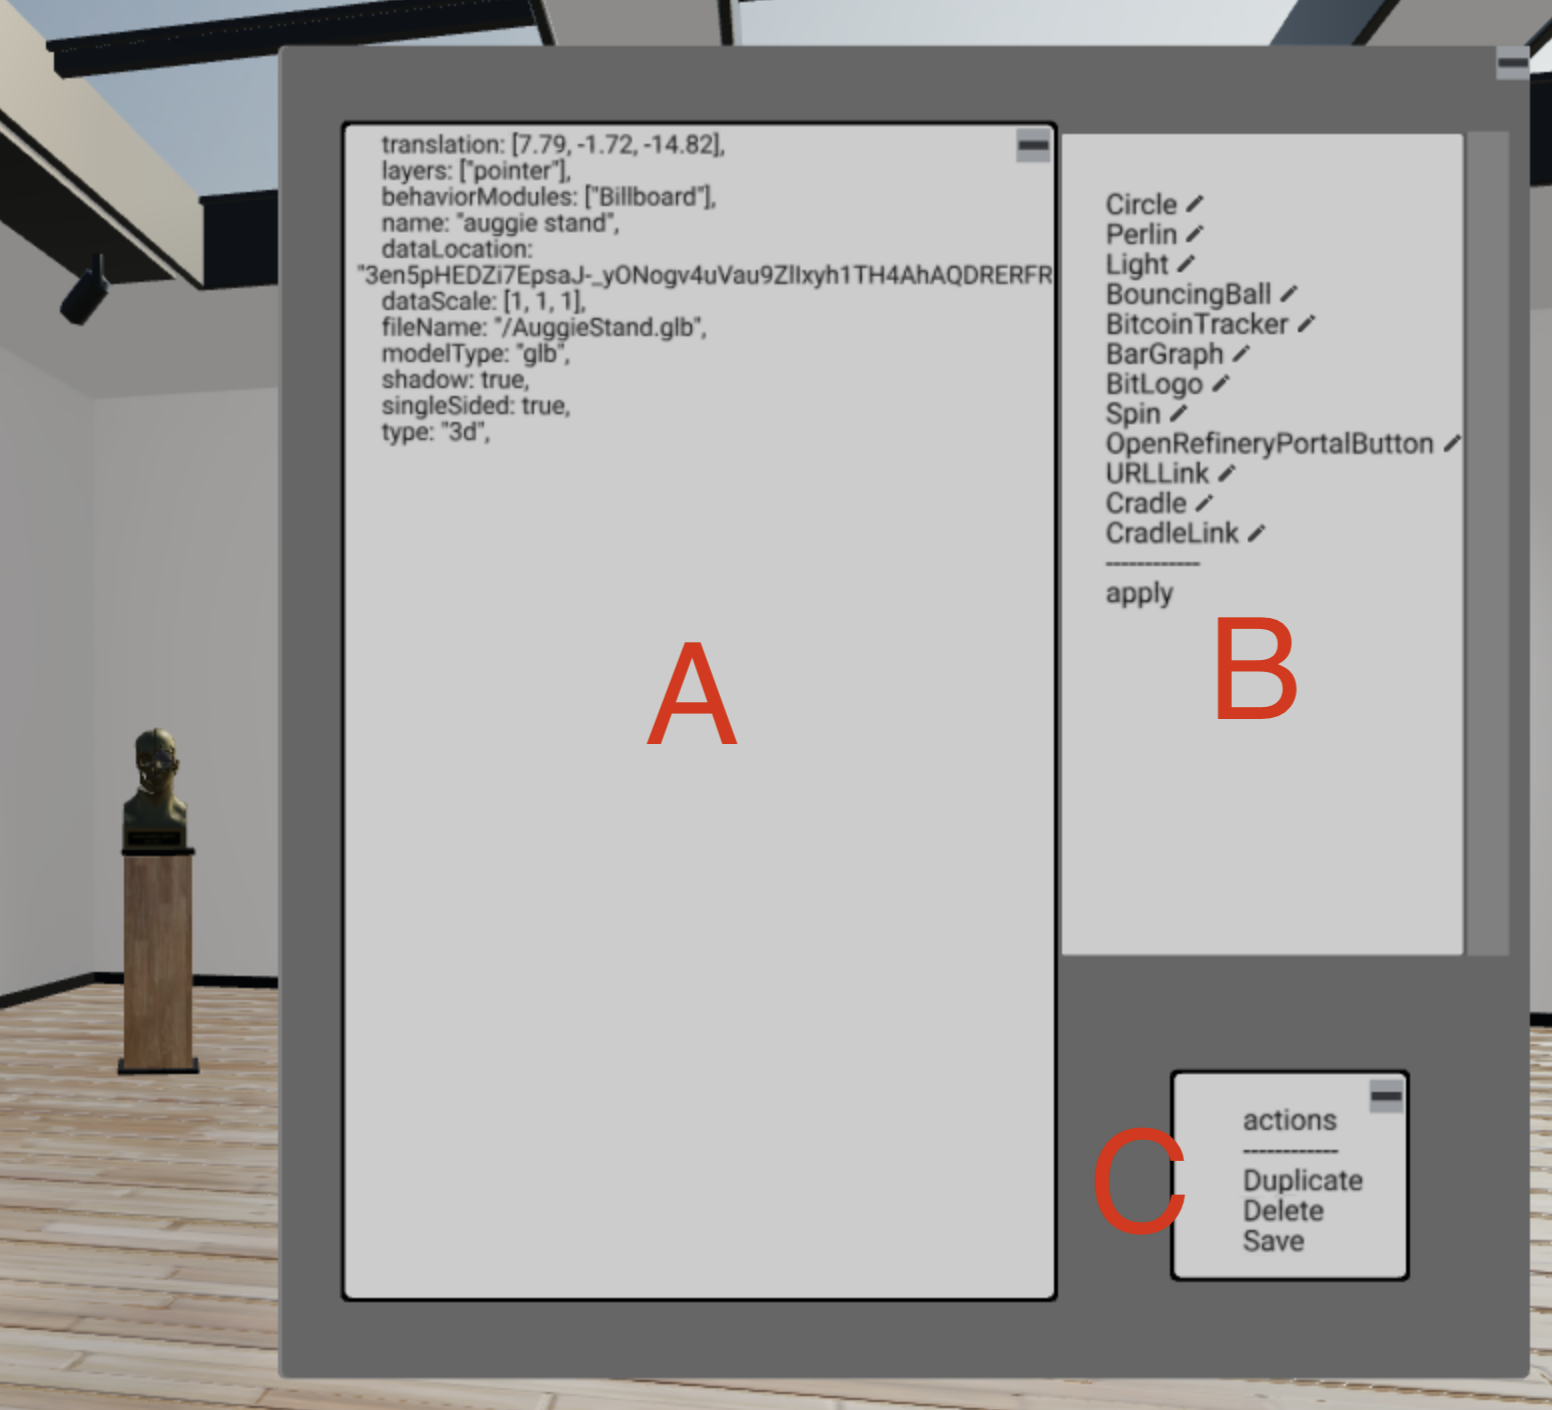
You can duplicate or delete the card from "actions". If you multi-select the modules and then press apply, you can attach or detach the modules (and the setup() and teardown() of them are called.)
The text area below shows the properties of the card in the format that is compatible with the card specification in the world file. You can edit values and hit Ctrl-S (on Windows) or Cmd-S (on Mac), and the values are used to update the card. Also, you can copy the contents to your world file.
Note however that the content is not evaluated as a JavaScript expression; rather, each line of the text is parsed, and the part after ":" is passed with JSON.parse() to create the value. (This is to avoid opening up full eval() feature from the property sheet.)
Saving the World to a File
With the Property Sheet, you can extract the values for your world file. You can also choose the "Save" item in the top-right menu to create a VRSE file. If you specify the location of the VRSE file to the ?world= URL parameter, the content will be used to start the world.
Persistence
The system stores the "persistent data" about every 60 seconds if there is some activity in the world. It contains essential data to recreate the cards, but does not contain transient values of views, or avatars' states. This data is used when you migrate a session to use a new version of the core library of Microverse or the Croquet OS. When the Croquet OS detects that the same sessionId and appId combination is used with different library it starts a fresh session but re-loads contents from the persistent data.
Also note that the start file, either in .js or .vrse, is used only once to initialize the session. Any changes to the file after starting the world will not have any effects if you open the same Croquet Microvese session, which is specified by the ?q= URL parameter.
Adding a new THREE.js library.
Look at src/ThreeRender.js. It imports additional Three.js libraries at the top. At the bottom of the file, it creates an object called THREE (separate from the imported Module) with those additional libraries. And finally it exports THREE, along with other objects.
It creates a new object called THREE. This is because as of version 143, it has legacy code for FontLoader and TextGeometry, which are frozen and cannot replace it. At the same time, a behavior needs to access those features through the global variable Microverse.THREE. So making a new object is a solution for this problem.
When you would like to add a new Three.js library, add a new import line similar to others at the top of ThreeRender.js, and then include the exported object at the bottom in THREE.
Developing the Innerworkings of the System
As describe above, you can create a new world, populate the world with objects, and add interactive actions to those objects by just writing world files and behavior files. If you want to deep dive into the code base, you can find the implementation of the Croquet Microverse in the src directory and the top-level directory. The main files that describes are card.js, code.js, Pointer.js, and avatar.js. The startup sequence and root Croquet objects are described in index.js, root.js, and shell.js. The portal feature is implemented in portal.js and frame.js, with help from the top-level shell.js. Other files, such as DynamicTexture.js, assetManager.js, physics.js, and worldMenu.js implement support features. the files in src/text implement the collaborative text editor.
npm scripts
npm run buildbuild a production build in the directory calleddist.npm run build-devsimulated the dev server's output and allows you to see what is generated as files.npm run file-serverruns a vanilla file server. This is useful to test the files indistdirectory.npm run create-versioncreates a one line file that contains the commit hash.
Publishing a new version of @croquet/microverse-library
- Update
npm/package.json, in particular the value forversion. - Update
package.json, in particular the value forversion. - Run
npm run build-lib. This creates a minimum set of files needed to run a test installation in the directory calleddist. This directory can be published as an npm package. - Run
npm publishin thedistdirectory. - Edit the line 32 of
index.jsof thecreate-croquet-microversegit repository so that it refers to the intended version of@croquet/microverse-library. If other dependencies need new versions, update them as well. - Edit the version of
package.jsonofcreate-croquet-microverserepository so that a new version can be published to npm. - Run
npm publishin the croquet-create-microverse.
Copyright (c) 2024 Croquet Labs